REVIEW · NELSON
Nelson to Mapua: Full-Day Self-Guided Cycling Adventure
Book on Viator →Operated by Mapua Ventures Ltd (trading as: Kiwi Journeys) · Bookable on Viator
A coastal ride with built-in freedom. This Nelson to Mapua bike adventure lets you explore at your own pace, with self-guided routes and plenty of reasons to stop along the way. You start with a minivan drop at the trail, then pedal when you want, pause when you want.
What I like most is the solid ride setup: you get a comfort trail bike, helmet, pannier bags, a repair kit, bike light, an odometer, and a trail map. Add the ferry crossing to Mapua and a restaurant discount voucher en route, and the day feels planned without feeling controlled.
The one thing to think about: the ride is described as easy and flat, but timing matters if you make detours for tastings. Some people also noted not-everything stays close to the main trail and part of the path can be rough or washed out after weather.
In This Review
- Key Things to Know Before You Pedal
- Why Nelson to Mapua Feels Like the Best Kind of DIY
- What You Actually Get: Bike, Helmet, Repair Kit, and Odometer
- How the Day Runs: 9:00 Start, Coastal Time, Ferry to Mapua
- Stop by Stop Along the Tasman’s Great Taste Trail (What’s Worth Your Time)
- Stop 1: Kiwi Journeys (Trail Time + Great Taste Trail Setup)
- Stop 2: McCashin’s Brewery (Tastings and Food Options)
- Stop 3: Pic’s Peanut Butter World (A Sweet-to-Salty Detour)
- Stop 4: Seifried Estate Cellar Door (Wine Tasting with Time Left for Cycling)
- Stop 5: The Grape Escape Cafe & Catering (Lunch and That Fruit Ice Cream Stop)
- Stop 6: Eddyline Pizzeria & Brewpub (Final Big Bite Before Shuttle)
- Value for About $80: Why It Adds Up (When You Use the Included Stuff)
- Price vs. Pacing: The One Tradeoff I’d Plan For
- Ride Comfort and Practical Tips (Especially If You’re a First-Timer)
- Weather Reality: When It’s Canceled, and When It’s Still On
- Who This Cycling Day Works For (and Who Might Want Something Different)
- The Best Way to Enjoy It: A Simple Strategy
- Should You Book the Nelson to Mapua Cycle Ride?
- FAQ
- FAQ
- How long is the Nelson to Mapua cycling adventure?
- What time does the tour start?
- Where do I meet, and where does it end?
- What’s included with the bike hire?
- Is the route self-guided?
- Is there a ferry involved?
- What food or drink costs are included?
- How do stops work during the day?
- What fitness level do I need?
- What happens if the weather is bad?
Key Things to Know Before You Pedal
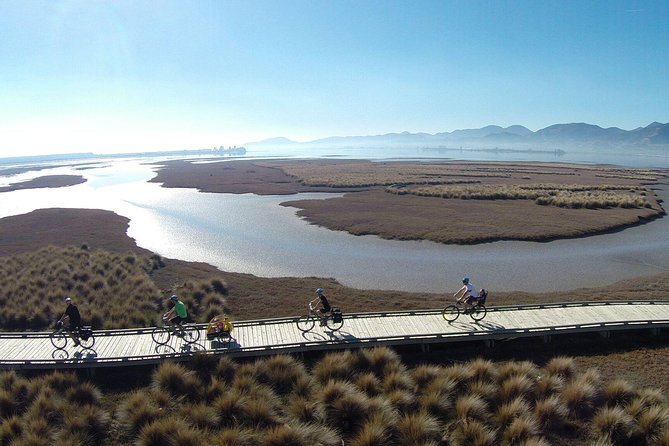
- Included bike kit: helmet, panniers, repair kit, bike light, odometer, and a trail map
- Minivan to the start: easier than figuring out where the trail begins on your own
- Stops built for food lovers: breweries, peanut butter, wineries, and a lunch spot in Mapua
- Ferry crossing to Mapua: part of the route, not an optional add-on
- Small group feel: capped at 12 travelers
- You drive the pace: stop whenever the mood hits
Why Nelson to Mapua Feels Like the Best Kind of DIY
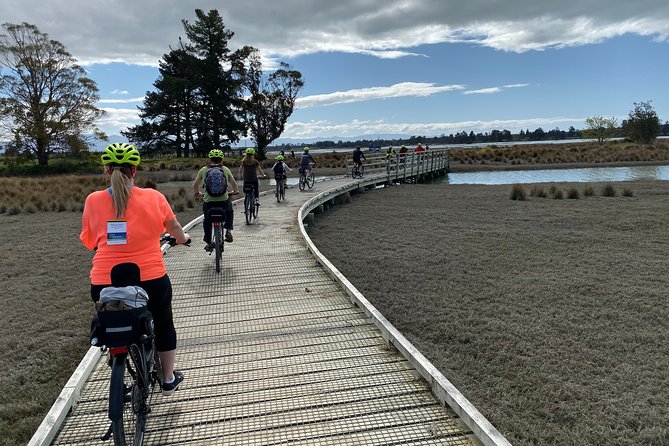
This is the kind of trip I recommend when you want local scenery without a rigid group schedule. You’re cycling the Tasman’s Great Taste Trail stretch between Nelson and Mapua, and you choose when to zoom ahead and when to linger.
The day’s structure is simple: you’re handed the bike and tools, dropped at the trail start, then you make your own mini-itinerary with planned stops. If you enjoy wandering for a good drink, a bite, or a quick photo, this format is perfect.
It also has a nice balance of convenience and independence. The minivan gets you going, but once you hit the trail, you’re truly on your own—except for the map and route guidance.
You can also read our reviews of more tours and experiences in Nelson.
What You Actually Get: Bike, Helmet, Repair Kit, and Odometer
Most bike rentals hand you a bike and hope for the best. This one does more, which matters when you’re cycling a coastal route and you want peace of mind.
Here’s what’s included:
- A quality comfort trail bike hire (operator is Qualmark Gold)
- Helmet and a bike light
- A repair kit
- Carrier/pannier bags so you can carry snacks, layers, or a small shopping haul
- An odometer and trail map for navigation and timing sense
That odometer + map combo is underrated. Even if you don’t love checking numbers, it helps you gauge how far you’ve gone and whether you’re on track to reach your next stop before ferry time.
And yes—if you’re new to cycling, don’t assume you’ll be left to figure it out alone. One featured note calls out how the team helped smooth nervous first steps, including for riders who were unsure about cycling on an e-bike.
How the Day Runs: 9:00 Start, Coastal Time, Ferry to Mapua
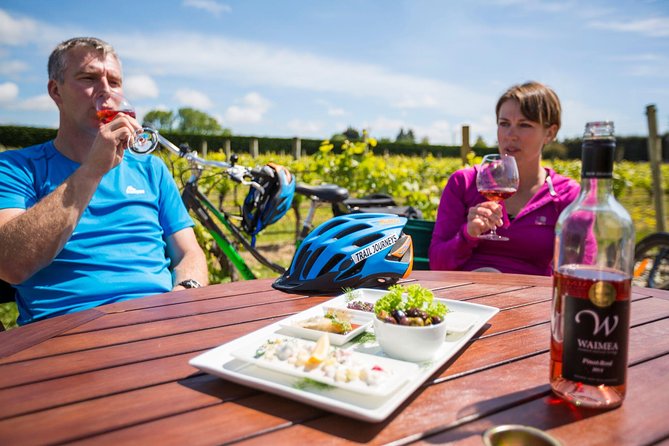
The schedule is designed to give you a real half-day to full-day cycling window, without turning it into an all-day grind. You start at 9:00 am from 16 Paru Paru Road in Nelson.
Duration is listed as roughly 4 to 7 hours, and that range is there for a reason: you control the pacing and you can add breaks. If you do tastings, stay for lunch, and linger for photos, you’ll be closer to the longer end.
A key part of the route is the Mapua ferry crossing, which is included. That means you can’t just treat the day like a casual loop. You’ll want to keep an eye on time so you don’t get stuck spending too long off-route.
At the end, you cycle back to the meeting point area. After the final stop, a shuttle takes you back to the Nelson city depot, which keeps the logistics from getting messy.
Stop by Stop Along the Tasman’s Great Taste Trail (What’s Worth Your Time)
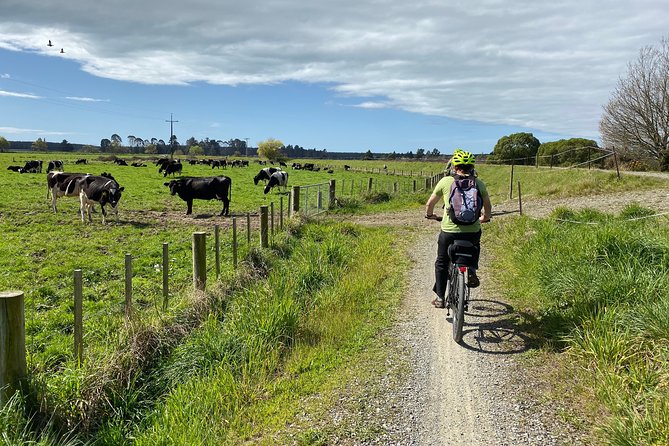
The stops aren’t random. They’re a mix of food, drink, and easy-to-find attractions that fit a coastal cycling rhythm. The trick is choosing what matches your appetite for tastings versus straight cycling.
Stop 1: Kiwi Journeys (Trail Time + Great Taste Trail Setup)
This is the starting stop on the day’s plan, with about 30 minutes allocated. It’s tied to Tasman’s Great Taste Trail, and it’s essentially where you get your day’s legs under you and start orienting yourself to the route.
What you’ll likely take from this first block is momentum: once you’re clear on where the trail is and how the timing works, the rest of the day feels less like a scavenger hunt and more like a smooth ride with good surprises.
If you’re the type who likes a quick briefing and then freedom, this start is your friend.
Stop 2: McCashin’s Brewery (Tastings and Food Options)
Next comes McCashin’s Brewery, with about 40 minutes planned. It’s marked as not included for admissions, so treat it as a place where you pay for whatever tasting or food you choose.
Why I like this stop for cyclists: breweries usually mean a cozy place to take a breather. After some saddle time, you get a reset—then you’re back on the trail.
The potential downside? If you overdo the tastings, you can chew up time that you might need later for ferry timing or lunch.
Stop 3: Pic’s Peanut Butter World (A Sweet-to-Salty Detour)
Pic’s Peanut Butter World gets about 1 hour on the route plan. Like the brewery, admission isn’t included, but the payoff is a fun, different kind of stop that breaks the wine-and-brew rhythm.
This is a good choice if you want something more playful than another cellar door. It’s also the kind of stop that can work well for mixed groups—people with different tastes can still enjoy the experience.
If you’re not into factory tours or shopping, you might shorten the stop and keep moving. The beauty of a self-guided day is you can make that call.
Stop 4: Seifried Estate Cellar Door (Wine Tasting with Time Left for Cycling)
Seifried Estate Cellar Door is a 40-minute stop and listed as free for the activity component. You’ll want to plan your tasting time carefully so it doesn’t balloon.
This is one of the more classic “Great Taste Trail” moments: wine tasting on a day where you’re already burning energy outdoors. It’s not just about the drink; it’s the atmosphere and the chance to stop without needing to plan transportation.
One practical note: it’s easy to underestimate how long tastings take once you factor in water, conversations, and deciding which bottle is coming home with you.
Stop 5: The Grape Escape Cafe & Catering (Lunch and That Fruit Ice Cream Stop)
The Grape Escape Cafe & Catering is set for about 1 hour, and it’s listed as free to include the stop. The day plan points to lunch and a fruit ice cream as a highlight, which tells you what this stop is for: refuel fast and keep your legs happy.
This is also a smart place to treat lunch as your anchor. If you want the day to feel smooth, aim for this as the moment you stop and eat, rather than scattering meals around multiple brief snacks.
If you’re chasing a very long, very scenic ride, you can lengthen this stop. If you’re trying to stay on schedule for ferry and the final stretch, keep it simple and timed.
Stop 6: Eddyline Pizzeria & Brewpub (Final Big Bite Before Shuttle)
Eddyline Pizzeria & Brewpub is the last stop, around 1 hour, and it’s listed as an included activity component (not requiring admission for the stop itself). It’s positioned as just as you turn toward the coastal route to Mapua.
If you like pizza and craft beer, this is the kind of finish that makes the whole day feel like it has closure. It’s also a good option if you want something hearty before the shuttle back to Nelson.
Then you head back via the included shuttle to the Nelson city depot.
Value for About $80: Why It Adds Up (When You Use the Included Stuff)
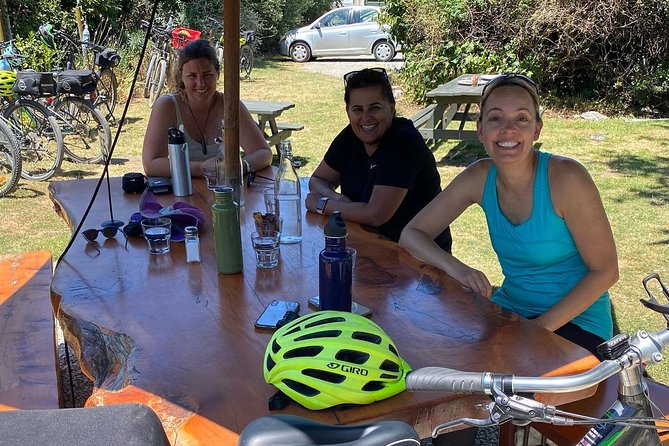
At $80.05 per person, the value hinges on what you’d otherwise have to pay for: bike rental, helmet, basic safety gear, and navigation support.
You’re not just getting a bike. You get pannier bags, a repair kit, bike light, an odometer, and a trail map. The ferry crossing and air-conditioned minivan transport to the trail start are also included, which would cost extra if you pieced it together yourself.
And then there’s the food-and-drink reality. Tastings and admissions at stops like the brewery and Pic’s Peanut Butter World are not included, so you’ll still spend on what you choose to eat and drink. But the structure helps you pick where you want that money to go.
Think of it as paying for the vehicle (bike + transport), the route support, and the “permission” to stop without worrying about logistics.
Price vs. Pacing: The One Tradeoff I’d Plan For
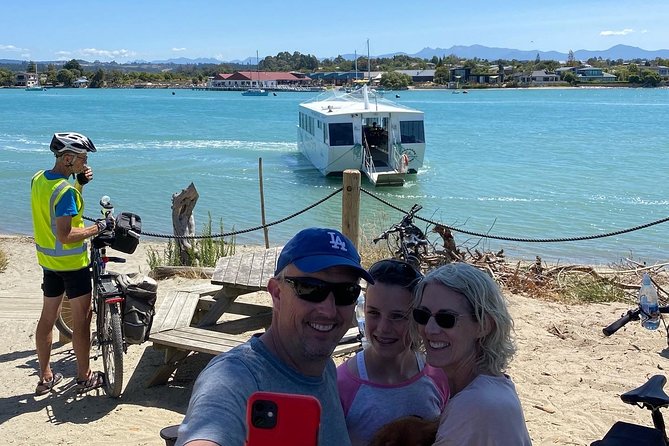
Even with included stops, you’re the decision-maker. If you want a lot of winery time, long tours, and multiple tastings, you’ll likely feel the day stretch toward the longer 7-hour end.
And if you go too far off the main route for side stops, you risk being rushed later. One note points out that some locations are off the track, and it can make you wonder whether you’ll still make the ferry.
So my advice is simple: use the stops like a menu, not like a checklist. Prioritize two tastings plus lunch. That’s usually the sweet spot for an enjoyable day instead of a frantic one.
Ride Comfort and Practical Tips (Especially If You’re a First-Timer)
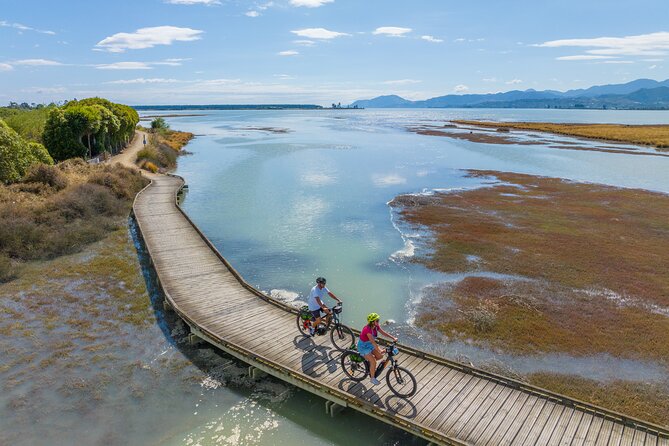
This route is built for “moderate physical fitness,” which reads like: you don’t need athletic training, but you should be comfortable riding a bike for sustained stretches.
A few things make the day easier:
- Dress for weather even if forecasts look good. The operator says it runs in all weather conditions, and you’re expected to dress appropriately.
- Keep your helmet on and your light handy. The gear is included, so use it.
- Don’t treat the trail map like decorative paper. It’s there to help you stay on route and keep timing realistic.
- Give yourself a little buffer at tastings. You can always go back for one more photo, but you can’t reclaim lost ferry time.
Also: the bike experience is designed to feel confidence-building. Comments about getting over nerves quickly suggest the team helps you get settled early. If you’re anxious about starting, pay attention to the early instructions and adjust your saddle/helmet right away if you’re able.
Weather Reality: When It’s Canceled, and When It’s Still On
This is an outdoors day, so weather matters. It operates in all weather conditions, and you’re told to dress appropriately. That means you’ll likely ride in misty or breezy conditions if the day remains viable.
If conditions are poor enough for cancellation, you’ll get an option for an alternate date or a full refund. That policy matters because a coast ride can get unpleasant when the wind and rain stack up.
My approach: wear layers you can handle fast, bring a rain layer, and don’t assume dry equals safe. Coastal weather can change quickly.
Who This Cycling Day Works For (and Who Might Want Something Different)
This trip fits best if you want:
- Independence with just enough structure to stay oriented
- A coastal route between Nelson and Mapua with food stops
- A day that mixes cycling and tastings without needing a full guided tour
It’s less ideal if you:
- Hate time-sensitive logistics like ferry crossings
- Want a fully guided narrative the whole day
- Plan to do every possible tasting with long tours at each stop
Also, it has a minimum age of 13, so check if that fits your group. The maximum group size is 12, which typically helps keep it from feeling crowded, even though it’s self-guided.
The Best Way to Enjoy It: A Simple Strategy
If you want this to feel fun instead of like homework, use a strategy:
- Pick one brewery or cellar door tasting.
- Pick one playful stop (like the peanut butter world style of attraction).
- Make lunch the anchor meal.
- Keep your final stop appetite large, but don’t turn it into a night out.
That way, you still get variety, but you stay calm about ferry timing. The day is at its best when you feel like you’re cruising, not racing.
Should You Book the Nelson to Mapua Cycle Ride?
If you’re looking for a practical way to experience Nelson’s food-and-coastal vibe, this is a strong choice. The included bike kit is the kind of value that makes a difference, and the self-guided format lets you match the day to your mood—slow tasting day or brisk sightseeing.
Book it if you’ll use the freedom: stop for the stops you care about, eat when you need fuel, and keep moving when it’s time to reach Mapua. I’d skip it if you want a guaranteed close-to-the-trail parade of wine tastings or you dislike any timing pressure at ferry transitions.
FAQ
FAQ
How long is the Nelson to Mapua cycling adventure?
The ride is listed as about 4 to 7 hours, depending on how much you stop and explore.
What time does the tour start?
The start time is 9:00 am.
Where do I meet, and where does it end?
You meet at 16 Paru Paru Road, Nelson 7010. The activity ends back at the meeting point.
What’s included with the bike hire?
You receive a quality comfort trail bike hire with helmet, a repair kit, pannier/carrier bags, a bike light, an odometer, and a trail map.
Is the route self-guided?
Yes. You can cycle at your own pace and stop wherever you want.
Is there a ferry involved?
Yes. A Mapua ferry crossing is included as part of the experience.
What food or drink costs are included?
Food is not included. Tastings or admissions at specific stops may not be included either, so you’ll pay your own way for what you choose to eat and drink.
How do stops work during the day?
You’ll have planned stops along the way, with time set aside for each. Some stop elements are listed as free and others as not included.
What fitness level do I need?
You should have a moderate physical fitness level.
What happens if the weather is bad?
The activity operates in all weather conditions, but it requires good weather. If it’s canceled due to poor weather, you’ll be offered an alternative date or a full refund.